


3D Gray Stone Peel and Stick Wall Tile
Bring Retro Country Charm to Your Home with BUYSTICKTILES 3D Gray Stone Peel and Stick Wall Tiles!
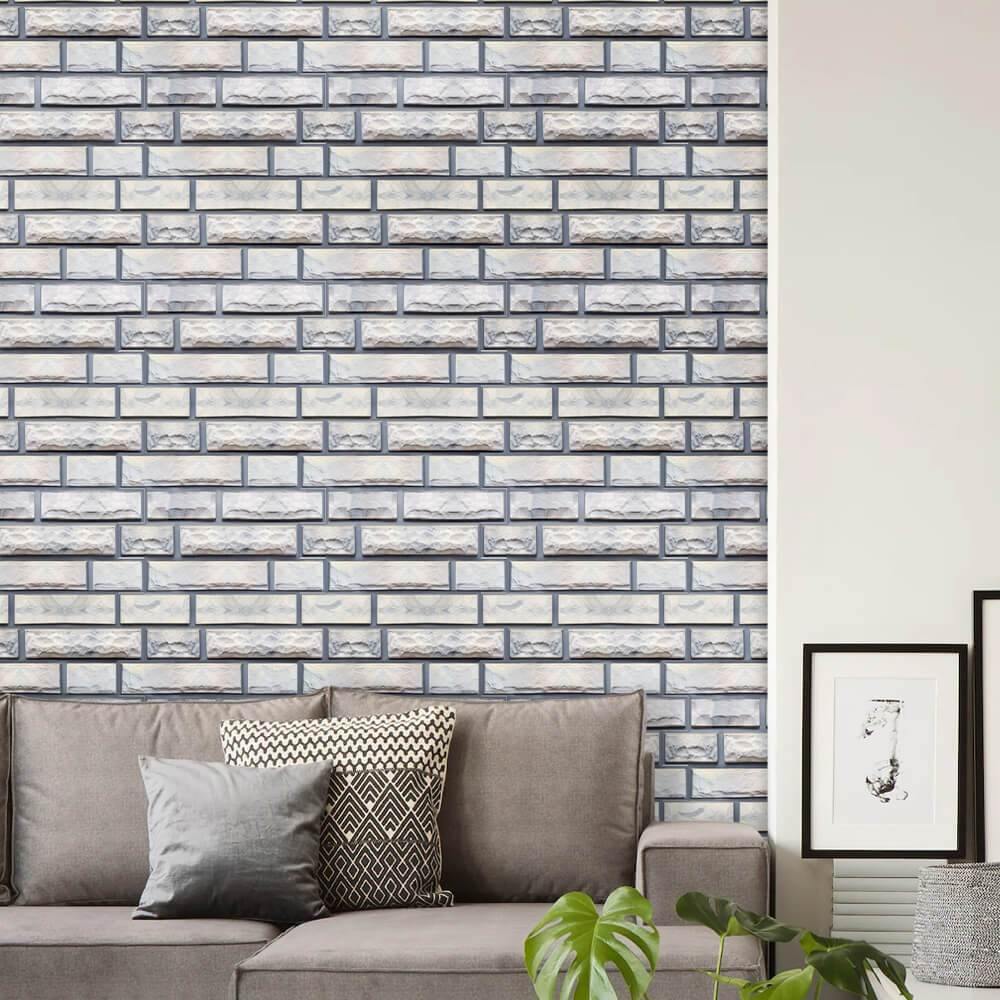
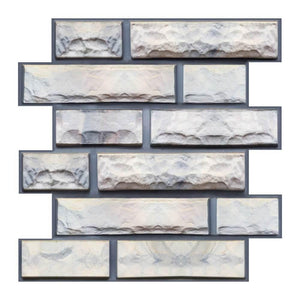
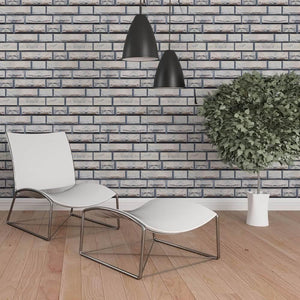
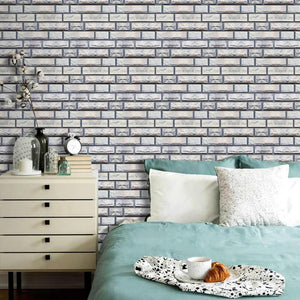
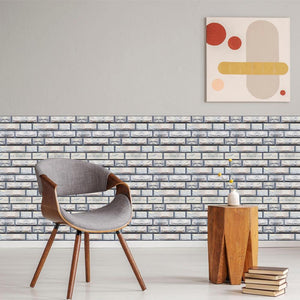
These self-adhesive 3D gray stone wall tiles are crafted from durable vinyl, offering a water-resistant and mold-resistant solution for stylish wall upgrades. With a realistic matte finish, these tiles beautifully replicate the look of natural stone bricks—giving your space a classic, rustic feel without the hassle of traditional installation.

Features
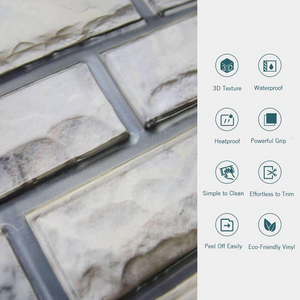
- 3D Black Marble Hexagon Design: The realistic 3D texture closely mimics real decorative tiles while remaining lightweight and flexible.
- High-Quality Material: Crafted from eco-friendly materials, free from dioxins, and resistant to heat and water—no fading over time.
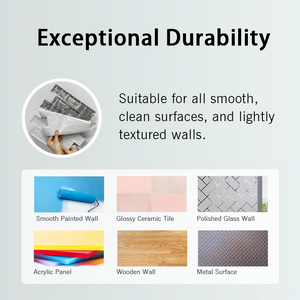
- Enhanced Adhesion: Upgraded adhesive ensures a strong hold on smooth, clean surfaces and even works on lightly textured walls.
- Effortless DIY Installation: No grout, no cement, no mess! Just peel, stick, and cut as needed—perfect for quick home upgrades.
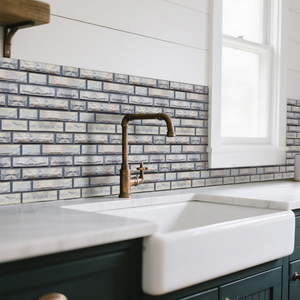
- Versatile Use: Ideal for accent walls in living rooms, bedrooms, TV walls, kitchens (as a faux marble backsplash), bathrooms, laundry rooms, hallways, offices, campers, and more.

Product Detail
-
Product Type: Stone-Texture Peel and Stick Wall Tile
-
Primary Material: XPE
-
Finish: Gray
-
Surface Type: Matte
-
Water Resistant: Yes
- Heat Resistant: Yes
Please note: Product images shown are actual photographs. However, colors may appear slightly different on screen due to variations in resolution, display settings, and lighting conditions.
Important: Purchase enough tiles at once to complete your project. We recommend allowing for a 10% cutting loss and ensuring all tiles come from the same batch to avoid slight color variations.
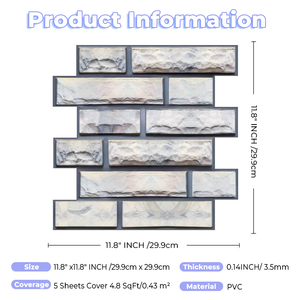
What's Include
- Pack of 5 Sheets
- 5 Square Feet / 0.5 ㎡ Per Pack
- 11.8 Inches x 11.8 Inches x 0.1 Inches / 30 cm x 30 cm x 0.3 cm Per Sheet
Installation Instructions
Step 1: Clean the Surface
Thoroughly clean the wall using a strong grease remover such as TSP (Tri-Sodium Phosphate). Ensure the surface is smooth and dry for optimal adhesion.
Tip: If walls have been freshly painted, allow up to three weeks before applying the tiles.
Step 2: Plan & Cut
Use a pencil and ruler to outline where each tile will be placed. For accurate cuts, use a box cutter and a metal ruler with a cork backing.
Step 3: Peel & Stick
Peel back a portion of the protective backing—avoid touching the adhesive to prevent weakening it. Align the first tile to your guide and press lightly into place. Once correctly positioned, remove the remaining backing and press firmly using a plastic smoother, especially over grout lines and textured areas.
Tip: The adhesive bond typically sets fully within 48 hours. For best results, re-press the grout lines after 24 hours using a smoother.
Step 4: Finish & Enjoy
Repeat the steps to complete your wall for a smooth, seamless finish.
For additional guidance, please refer to our Installation Guide for 3D Peel and Stick Wall Tiles.

Wall Application Guidelines
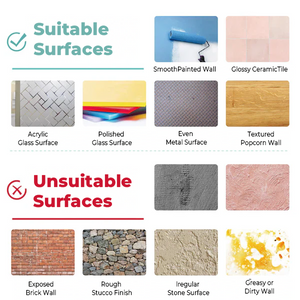
Recommended Surfaces:
These tiles adhere best to smooth and clean surfaces such as:
- Smooth ceramic tile backsplashes
- Smooth glass tile backsplashes
- Acrylic wall panels
- Painted drywall (gypsum)
- Wall linoleum
- Stainless steel
- Mirrors
- Laminates
- Wallpaper (if any edges are peeling, remove them before applying the tiles)
Surfaces Not Recommended:
Avoid applying tiles to the following:
- Greasy or oily walls
- Brick
- Stucco
- Stone
- Unfinished drywall or plaster
- Unpainted plywood
Important Note:
If the wall surface is unsuitable or if additional bonding strength is needed, we recommend using 3M Purpose 45 Spray Adhesive for improved adhesion.

BUYSTICKTILES 3D Peel and Stick Wall Tiles are the perfect choice for giving your interior walls a fresh, updated look. Transform your space in minutes—no need for extra labor or the mess of traditional tiling! Fall in love with your walls all over again.
Explore more patterns and designs from the BUYSTICKTILES 3D Peel and Stick Wall Tile collection.

Installation Information for BUYSTICKTILES’s Peel & Stick Products
To ensure a successful installation of your Peel & Stick Tile, please read and review these important installation information bullet points, as well as the back of the product’s packaging:
- Depending upon your product, most Peel & Stick products can be cut with a“sharp” utility knife. Be sure to have extra blades on hand. Some Peel & Stick products do require the use of a wet saw to cut the tiles. Please refer to the product information card on the back of your tile product for details.
- Make sure that the surface is flat, smooth, clean and free of dust, dirt, oils and moisture;
- Check all pieces for any undesired characteristics or variations in pattern before installing;
- Measure each area where each tile is going then mark those cut lines on your tile piece;
- To cut tiles with a utility knife, use a metal ruler or square, balancing your sharp utility blade against its edge. Press firmly on your knife and score along the same line 3-5 times. Bend the tile at the score mark. Flip the tile over, placing the metal ruler along the score mark. Score 3-5 more times. Snap the tile at the score mark and trim off any excess backing. PRO TIP: Cut your tile in one continuous line;
- Change the utility blade knife after 2 tiles;
- Some tile patterns like herringbone, chevron, and hexagon, are difficult to cut because of their shapes. However, using a sharp blade helps prevent frustration;
- Make sure that the tile is positioned properly before applying any pressure to it;
- Apply pressure to the middle and the four corners of the tile;
- Applying pressure to the tile will permanently bond it to the wall. If the tile is installed in the wrong position, removing it may cause damage to the substrate where the tiles have been applied.